Bay A12
ReceivingUse the shared map before moving accepted, damaged or unclear pallets away from intake so Hold Area B and dispatch dependencies stay visible.
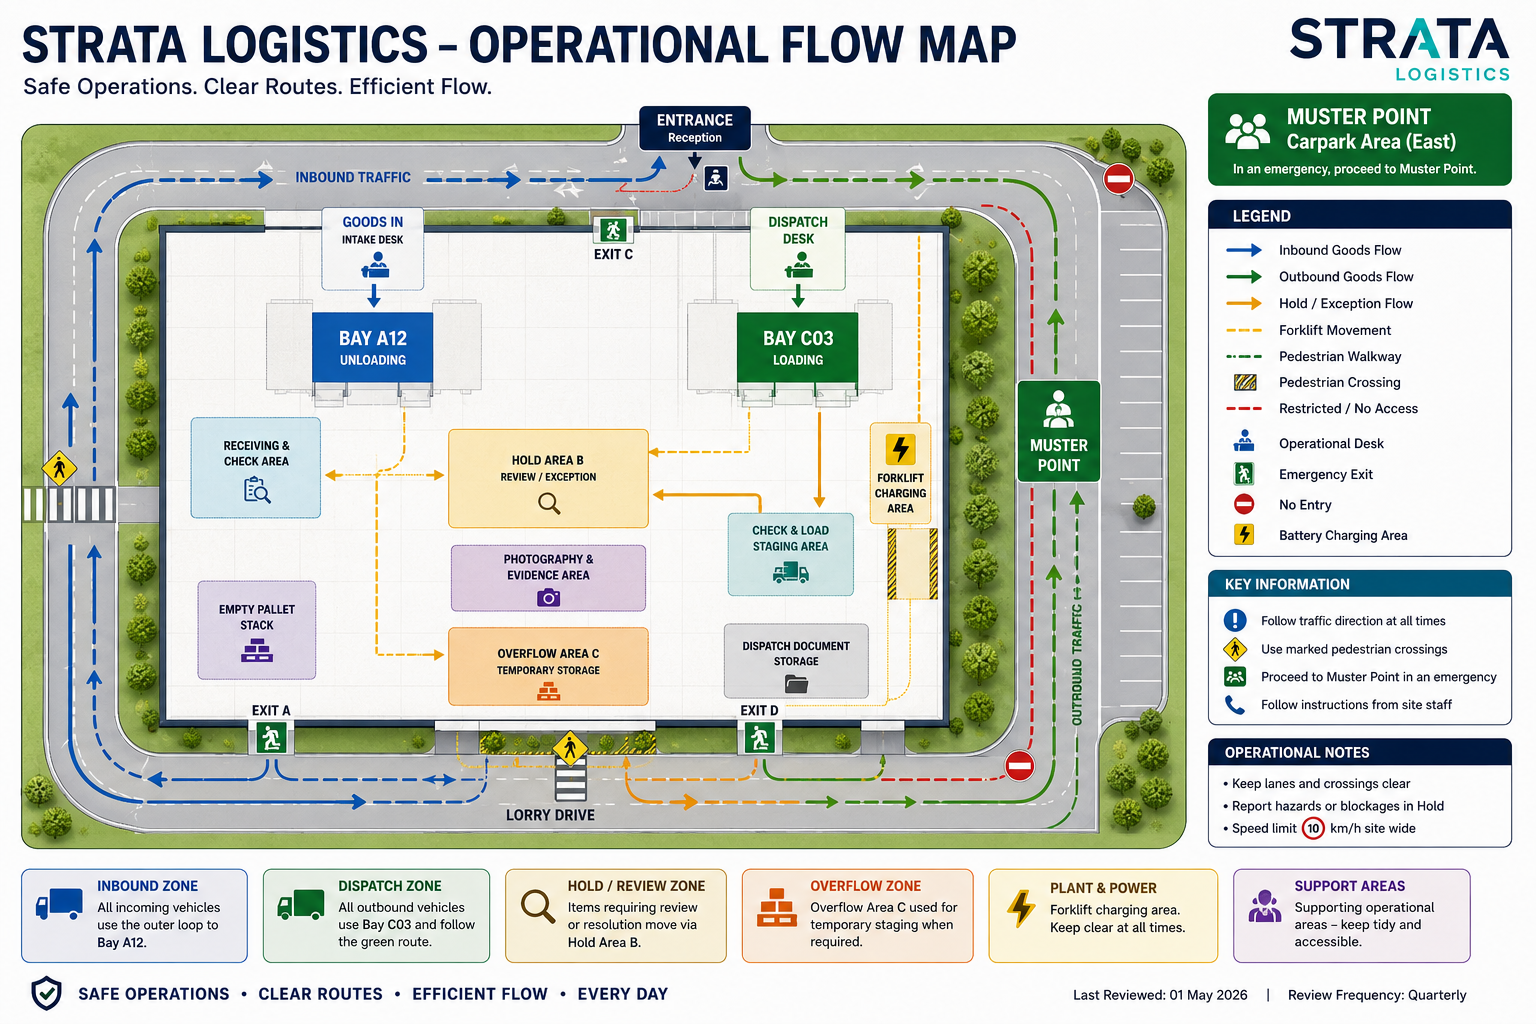
Shared Logistics Layout
Overall floor layout and movement dependency view for goods-in, dispatch, hold review, forklift routing and emergency access awareness.
Shared layout awareness
Role-aware movement windows
Use the shared map before moving accepted, damaged or unclear pallets away from intake so Hold Area B and dispatch dependencies stay visible.
Check Bay C03 against forklift movement, carrier timing and Hold Area B release decisions before confirming outbound loading.
Held loads should retain origin, evidence, destination and route context before returning to stock, dispatch or supplier return.
Forklift 03 should be checked against current route restrictions before entering Bay A12, Bay C03 or hold transfer routes.
Forklift 04 supports dispatch movement and should keep handover, inspection and route uncertainty visible before active use.
Map relationship note
This shared layout is for overall orientation, route dependencies, possible conflicts and emergency access awareness. The Bay A12, Bay C03 and Hold Area B maps remain useful local detail maps for area-level routing and should stay in use alongside this shared view.